Fireweed Honey

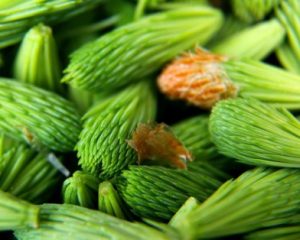
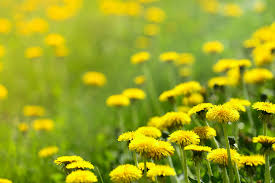
Being on vacation in Alaska means I see fireweed all around me. It also means many Alaskans are talking about or making fireweed honey, syrup, jelly… whatever. Fireweed is ubiquitous everywhere at this time of the year. And everyone knows that the taller the blooms, the later in the season it is. When the bloom hits the top, summer is over. In other words, is a measure of the season.

Jelly is delicious when made with fireweed, but making honey is what many do instead. Unlike honey that bees make, fireweed honey is really a simple syrup infused with the flower. And not only can this honey be used for biscuits, hot tea and the like… one can also use it in place of regular simple syrup in any drink recipe.

FIREWEED HONEY

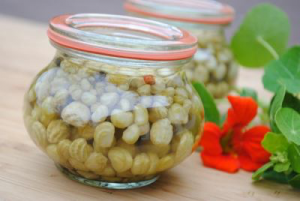
50 red clover flowers
10 white clover flowers
25 fireweed flowers
1/4-1/2 cup karo syrup
5 cups sugar
3 cups water
3/4 tsp alum

1. Wash blooms in cold water and gently shake off excess water. A salad spinner is awesome for this purpose. Otherwise, let the blooms dry off on some paper towels. Make sure the blooms are insect free. And pick over to remove any green parts, otherwise your honey will taste grassy or “green.”

2. Put syrup, sugar, water and alum into a pan and boil for 10 minutes. Take off heat.

3. Add the cleaned, dry blossoms to pan and let steep for at least 10 minutes. You can let this steep up to 3 hours. The longer the steep, the more fireweed flavor will be imparted.

4. Strain through cheesecloth or a strainer lined with a paper towel. You want to remove any little bits.

5. Pour into jelly jars for water bath process. Boil for 10 minute before sealing lids. You can skip the water bath stage if you use the honey quickly. However, you will have to keep it refrigerated. Water bath processing will allow you to keep the honey for at least a year in the pantry.

*Note: you can omit the corn syrup- I use golden syrup from England, if you like. However, the corn syrup prevents sugar crystals from forming.

**Pro-tip: adding in corn syrup to any sugar recipe will help retard sugar crystal formation. I add in 1/4-1/2 cup to my sorbets. If you’ve ever eaten home made sorbets, water/sugar crystals can form making the mouth feel of the sorbet not quite right. Add in some corn syrup and you will have velvety sorbet. This holds true for regular simple syrups, as well as this delicious fireweed “honey.”

Make a batch. And share it. Puts some in your tea when you are curled up with a good book. Or add it to a cocktail when you are wanting something special to celebrate someone special.

Spruce Tip Vinegar

Evergreen trees have two “flowers” which are useful and edible- the cones and the tips. Pine nuts come from pine cones and they are laborious to acquire. The tips of evergreens, like spruce, however, are far more readily foraged. Using evergreens might seem odd, but think of these as rosemary’s much stronger cousin. Most things you would use rosemary in, spruce tips can be substituted.

When picking these tips, choose the bright green portions only. Some will still be covered in paper as they emerge. There should be a clear distinction between old growth and new growth.

Ingredients:

2 cups red wine vinegar (unfiltered apple cider vinegar can be used for up to half the recipe as well)
1 cup spruce tips, roughly chopped
1 tsp black peppercorns

Directions:

Put all ingredients into a large glass or ceramic container and stir. Cover with cheesecloth and secure with twine. Find a dark, dry place and leave it for 2 weeks. Every few days, take the cover off and stir. Replace the cover and wait. Taste the vinegar at the end of the two weeks. If it isn’t the strength you want, leave it for two more days. Taste it again. Keep tasting every two days.

Side note: Roughly chopped spruce tips can be added to salt to make a spruce salt. Which is delicious on roasted potatoes and french fries.

The vinegar can be used to make a lovely vinaigrette. And for marinades. Which can lead to a lovely dinner. A lovely, romantic dinner. Pro-tip: No matter HOW much love is in the air because of all the killer food, don’t drink the vinegar straight.

Dandelion Jelly

Every girl should have a jelly recipe. One that is her signature jelly. My mom loved strawberry. I’ve always been drawn to the more exotic. Or maybe I was just a rebel. Growing up, I insisted on grape jelly. Bucking the trend and my mom to pick an interloper. I like jelly on savory applications, like breakfast biscuits with sausage. That sweet and salt combine to make more that the two ingredients alone. Over the years, I’ve tried blackberry, blueberry, raspberry, peach and combinations of those flavors. I’ve made strawberry lemon marmalade and I’ve tried even more almost jams, like guava curd.

If your an Alaskan girl, you might have at some time tried dandelion jelly. And if you are of Korean heritage, you might’ve already eaten dandelion leave kimchi. So, you’ve grown up knowing dandelions are more than the weeds lawn care companies tout them to be. They can be a source for some interesting tastes and delicious flavors.

When you are harvesting either the flower buds or the leaves, be sure to pick from areas not sprayed with any pesticides or herbicides. Wash everything thoroughly and spin it in a salad spinner to get the water all the way off. For the flower buds make sure to remove all the green. Including any in the jelly recipe may yield a bitter flavor that is not pleasant. As for the leaves make sure not to include any of the stalk or milky liquid the salt exudes.

Dandelion Jelly

Ingredients:
1 quart dandelion flower buds
5 1/2 cups vanilla sugar- or split one bean into 5 1/2 cups regular sugar
1 lemon- tested and juiced
1 box of pectin
2 quarts water
1 coffee filter

1. Boil flower in the water for 10 minutes. Strains the liquid squeezing the flowers to extract all the juice. Strain again through the coffee filter to remove any sediment. Measure out 3 cups of liquid.

2. Bring dandelion water, pectin, lemon zest and juice to a boil. Add in sugar. Hard boil for 1-2 minutes or until the liquid sheets on the back of a spoon. Skim any crud off the top and pour into jelly jars. Makes about 9 half pints or 5 pints.

*hint: You can add yellow food coloring if the light color isn’t yellow enough for you.

This jelly is lightly floral and sweet. I think it would be perfect as the base for a fruit tart glaze and as the base for a BBQ sauce for fish. It’s also good toast with tea. And if there is romance in the air… tea for two.

Hibiscus Butter

Hibiscus Butter might seem like something inedible, but I assure you it’s delicious.

I first encountered hibiscus as an edible flower back when I was exploring cocktail recipes in Death & Co.s fabulous recipe book. The advent of craft beers has inevitably lead to craft cocktails. And because I’m older, wiser and less able to recuperate I’ve turned to making one or two great drinks as opposed to indiscriminately imbibing anything willy-nilly.

However, this post is not about how to make delicious syrup from whole dried flowers. This post is about how to make yummy butter. Here’s the deal, you can use hibiscus tea from the supermarket. But your butter will turn purple as the tea infuses into the butter. If you order your flowers or get them in a supermarket with the proper ethnic makeup to carry such in stock, your butter will be a light pink. I believe it is the additional ingredients most manufacturers put into hibiscus tea, but I could be wrong. Maybe they have access to super top secret hibiscus flowers which turn purple upon infusion. Because with both the tea and the dried flowers that is what you will do.

You bring your butter- a full pound- up to a slow simmer until completely melted. Take it off the heat. Put either 20 bags (about 1/4-1/3 cup loose leaf tea) of hibiscus flower or 4-6 dried flower into the butter. Let it cool a bit. Test after 15 minutes or so. If the flavor isn’t strong enough, let it steep another 5 minutes. Keep checking every 5 minutes until the butter reaches your desired flavor.

As a side note, if you’ve never tasted hibiscus, it is sweet and tart. When you taste test your butter, if you add a sprinkle or two of sugar granules to offset the tartness, you’ll get a better idea of how your butter will fare in various recipes.

If you wish a smooth butter, strain through a cheesecloth while the butter is still runny and viscous. Make sure you squeeze out each last drop. If you want little flecks of flower in your butter- only recommended for the actual flowers, not the tea- make sure to pulse the dried flowers BEFORE including it to steep in the butter. At this point, you can use this butter as is in any recipe which calls for melted butter. Or you may place this into a container in the refrigerator and let it solidify to use as a butter cream base.

A fabulous way to use this butter is in shortbread and other delicate dessert recipes. And who knows, maybe you’ll be inspired enough to make this into sugar and also full flower syrups. They are a beautiful addition to any table.

Lilac Whipped Cream

Yes, yes you CAN make whipped cream from lilac flowers. And it is the BOMB!The ingredients aren’t many, but the results? FAB-U-LOUS!

If you have the time, make some Lilac sugar using the same technique for rose sugar.

Take 2 cups of whipping cream and infuse 2 cups of lilac flowers. If you are using fresh, make sure they are dry and all the green has been removed. Throw them into the cream and let steep for at least 24 hours. Start tasting every 4-6 hours thereafter to see how strong the flavor is. Once it’s where you want, strain the cream through a strainer to remove any flowers. And use as you would any regular whipping cream, although I’d only use it with things that will be delicious with lilac. Like cakes and pies. If you want the added sweetness, add 1/4 cup of sugar about halfway through the whipping process. So, steep the flowers, strain, and then whip. Easy-peasy.

As you are making this whipping cream , it is very important the you taste all along the way. This cream would also make an excellent base for ice cream.

No matter who you are, air redolent with lilac… heavy with promise is all the things that ROMANCE and spring time is all about. Use the whipping cream with a HEAVY does of imagination!

Orange Blossoms

Winter is the time of the orange. They are just now in season and that season will continue for a few months. In fact, in Forida, the growers are all in a tizzy because the Department of Agriculture just downgraded their projection for this season. It’s worrying a lot of people. And if there’s going to be a shortage of oranges, well, then you need to find another way to get this delish floral into your mouth.

Orange blossoms have a delicate orange-y scent as long as they aren’t hybrids. The recipe below for orange blossom syrup uses store bought orange blossom water. But if you are near citrus groves, particularly Seville oranges, then you have a unique opportunity to make your own orange blossom water. However, if you decide to go this homemade route, add several weeks to the recipe time as you let the orange blossoms steep to extract maximum flavor and scent.

Also, as with the rose sugar recipe from a previous post, one can make orange sugar as well. To make this variation, add a few orange peels to white sugar and let sit in a cool, dark place. Taste frequently until the flavor comes through to the degree you desire. Letting the sugar sit long adds depth to the flavor.

Orange Blossom Syrup

1 cup sugar
1 cup water
1 tablespoon lemon juice
2 teaspoons orange blossom water

In a small heavy saucepan, combine sugar, water and lemon juice and bring to a boil over medium high heat. Reduce heat to low and simmer for 10 minutes. Add the orange blossom water and take off the heat immediately. Pour into a heatproof container and let cool to room temperature. Then refrigerate to cool completely. Like other simple syrups, this will last a few days to a week. And it is yummy in iced or hot tea.

To make your own orange blossom water, choose high quality, organically grown Seville orange blossoms. Picking them early in the morning is preferable to any other time as they are fresh with dew and at their peak. Wash them and then macerate either in a food processor on pulse or in a mortal and pestle. Place the macerated blossoms into a container and cover with distilled water. Let sit for several weeks in full sun as you check on the scent and flavor. Once it it to your liking, strain into little jars and store in your refrigerator. Helpful hint: Use less water and the most blossoms you can. The flavor and scent infuse faster into smaller quantities of liquid.

You don’t need to make your own orange blossom water to get great quality. Many Middle Eastern and Asian markets carry several brands and these make good syrup.

Scents and flavors are important ways to engage our senses. And I’m not sure why Mother Nature made orange season winter, but I am ever so glad. There’s something yummy and delicious about orange scent in the dead of winter. That bright color, sweet flavor and intoxicating scent all play off the whiteness of winter, the dullness of the drab and the deadening of senses that snow and ice have on us.

Oranges break through all of this and seduces our sense with the promise of… something else. So, you dear reader, are in charge of how you will use this seductive syrup to the most tantalizing effect.

Thanksgiving, Love, and Green Bean Casserole

About 30 years ago, I got married. Now, it’s been a while since I’ve been a Newlywed. But some memories will never fade.

Like how much I love green bean casserole. I have since a friend of mine made some for me in college. I’m half-Asian. I grew up with fried rice and noodles. And very few casseroles. I would occasionally encounter one at my Aunt Jessie’s. My dad’s side of the family are from Kansas and are salt of the Earth people. But our trips to visit family back in the day were expensive. And therefore, few and far between. As a result, I never had green bean casserole until I left to go off to college.

An obsession was born. I liked it classic and I liked to mess around with the recipe even back then. Adding in chicken or changing the mushroom broth up. All of that. It wouldn’t be until the latest decade of my life before I would have another green bean casserole revelation. Making home made mushroom stock. And homemade cream of mushroom soup. Using fresh green beans and just fresh ingredients all the way around. This adult version taste nothing like the classic and a thousand times better.

Because of my love for green bean casserole, I made it ALL THE TIME. And my husband ate it. After a year into my green bean casserole obsession, my husband FINALLY told me he hated green bean casserole. That he threw it out when I wasn’t looking. But he never said anything because he didn’t want to hurt my feelings. And he thought he could ride out my obsession, but the sheer amount of green bean casserole I was making was making that possibility impossible. So he came clean.

And that’s when I knew he loved me beyond reason. Well, I knew even before that but this cinched it, for sure.

I don’t make green bean casserole so much anymore. Just once a year. At Thanksgiving.

It’s Been Thirty-Five Years

This coming Monday. It will be my 35 year wedding anniversary.

We eloped. And got married in a little blue church. And on Monday those vows will have been in existence for thirty years. It’s almost unbelievable.

It’s not all ups. There are tons of downs.

It’s about perseverance and grit.

And love.

The everyday kinda of love. The every way kind of love. It’s making love both a verb and a noun. It’s about showing up everyday. Rain or shine. Mostly in rain. Because when it’s sunny you always want to be there. It’s also finding something in showing on rainy days.

Writing about love and sex is impacted by experiences of real life. There is a joy in knowing all the nuances of an adult relationship. And being able to convey on the page to others. There is a fullness to a love interest which has developed over decades and not days or months. A rich tapestry that maybe isn’t in a shorter lived entwining.

Is there a secret to a relationships longevity? I’m not sure. I think I’m just a bitch who doesn’t like to admit defeat. About anything. Most especially about my life partner choice. Because he’s the bomb. Don’t think I’m the only one showing everyday. Nope, he does, too. And it has to be that way or it doesn’t work correctly. You can’t have just one person in a two person tango being the sole wanter of the dance’s success. You need them both to care. Deeply.

Or it could be that I supported him and he supported me. As long as you can afford it and it doesn’t go against your morals, when your partner wants something… you should just say yes. You should be the facilitator of your spouse’s ability to dream and strive and try stuff. Not the person harshing the mellow. If you can’t afford it, say no. If it’s immoral, say no. Otherwise. say yes. Why not? And why would you be anything other than totally supportive if it’s not a financial burden and it’s not a bad thing.

I don’t have huge amounts of words for detailing why we’ve made it when so many others haven’t. But we have. And if the last thirty years are any indication, I’m pretty confident if I live another thirty years, it will be with him. He just rocks like that. And we fit. But that could be because we grew up together and became adults married. Or it just could be that he has a nice ass.

Nasturtium Capers

Yesterday was Valentine’s Day. A day for lovers of all kinds. If you’ve done it right, your waistline is a little bit wider and your wallet is a little bit lighter. Part of the day after should be something light, something great and something that helps cut through all the richness from the day of indulgence that Valentine’s Day represents.

Nasturtiums are the answer. Many of you probably already know that the flowers are edible. They have a sharp, peppery taste which adds a little bit of goodness to any dish. Not only do they make salads beautiful and colorful, they add a peppery layer that black peppercorns just can’t add. But did you know that you can whip those flowers up into a butter? Nasturtium butter adds a floral, pepper flavor to toast, scones and anything else slathered with this rainbow-y goodness.

But the real gems are the seeds. I’m not sure if you’re a caper lover like me, but nasturtium seeds can be turned into awesome almost capers. These have been dubbed poor man’s capers. The great thing is that nasturtiums grow abundantly. And if you’ve seeded them in the proper place, you will have flowers coming back year after year. Which means you will have nasturtium capers every year as well.

Ingredients:

2/3 cup nasturtium seed pods, cleaned
1/4 cup salt
2 cups water
2/3 cup distilled white vinegar (5% acidity at least)
1 tsp- 2 tbsp sugar

optional ingredients (pick 2 at least):
bay leaf
coriander seeds
tarragon or other fresh herbs
jalapeno
red pepper flakes
juniper berries
pickling herbs

Directions:

Divide nasturtium seeds into half pint jars. Add optional ingredients to the half pint jars. They can be different. In fact, you should try out different flavor combinations to see which you like best. Dissolve salt and sugar in the water. Add vinegar and bring to a slight simmer. Pour over seeds, seal and store. There’s a lot of mustard oil in the seeds. So they might be too strong for some people at this point. If you find that they are too much for you, an extra processing step might be needed.

If you find the seeds to be too strong even with a good vinegar brine, seperately salt brine them first. Use the salt and water to create a salt brine and soak seeds for 2-3 days in one large quart jar. Drain and rinse seeds several times and divide into pint jars. Then make the sugar/vinegar brine and pour over seeds in half pint jars- don’t add more salt at this juncture or the seeds could become too salty. At this point, add in the optional ingredients and the sugar/vinegar brine. Process either by refrigerating or hot water bath.

These will keep forever. Well, not literally forever. But a really long time. So the next time, you’ve eaten too much or partied too hard, the next day use the vinegar-y goodness of nasturtium seeds to cut through all that bulls..shtuff.

Lavender Ice Cream

You might have figured out by now–although this is only my second post–that flowers play an important part of what I think of when I think of romance. The way they look. They way they smell. And yes, even the way they taste.

It might be odd to find a recipe featuring ice cream in November. But if you think about how heavy many of our menus are during this month, it isn’t that surprising that something that’s light and refreshing might hit the spot. When holiday meals become too much, grab your special someone and share lavender ice cream… right out of the tub.

It’s really rich, so like the best of things, small amounts go a long way. And a shared delight is just that much better.

Lavender Ice Cream

6 egg yolks
2 cups half and half 1 cup cream
2/3 cup vanilla sugar
1 vanilla bean
3 whole lavender tops or 2 tbsp dried lavender- be sure to use organic, food grade

1. Prepare a water bath in a large bowl. Set aside.

2. In a saucepan, heat half & half with the cream and the vanilla bean pod denuded of its interior until it simmers. Take off heat and add in the lavender to steep. Set aside until almost room temperature, about 45-60 minutes. When the time has lapsed, strain the mixture and bring it back up to temperature- just short of simmering again. Take off the heat. *Pro-tip: Frozen foods need more flavor for it to come through the freeze. So taste the cream mixture. It should taste fairly strong. Don’t be alarmed. Once the ice cream is fully frozen, the flavor will have mellowed out. In fact, with any flavoring that you add to ice cream or any frozen dessert, it’s best if the flavor is pretty strong prior to freezing to get the best flavor.*

3. Mix egg yolks until lighter in another bowl. Add in vanilla sugar and the scraped out insides of the vanilla bean. Mix well. Temper the eggs with some of the cream mixture until the eggs are brought up to the same temperature as the cream mixture. *tempering of the eggs is why you brought the cream back up to temperature in the last step* Pour it all into the saucepan. Heat over medium-lowish heat for about 2-3 minutes or until it coats the back of a spoon or it reaches 170 degrees.

4. Pour the mixture back through a fine mesh strainer into the egg/sugar bowl and put it all into the water bath. Bring the custard down to room temperature as quickly as possible. About 30-45 minutes. Put it into the fridge uncovered until it no longer forms condensation. Then cover and let sit in fridge for 4-6 hours or overnight.

5. Put into ice cream maker and follow the instructions for the machine.

This ice cream is particularly delightful with sugar cookies made with rose sugar or orange sugar.

Enjoy!

~D